

Configuring Amazon S3
Amazon’s S3 Service is an ideal place to store Kolide’s logs, especially if you want to stream it to another destination that Kolide doesn’t support natively. In this article, we will discuss how to prepare your AWS S3 environment to receive logs from Kolide.
From the Log Destinations list view:
- Click Add New Destination
- Click Amazon S3 Bucket
- Choose the desired authentication method
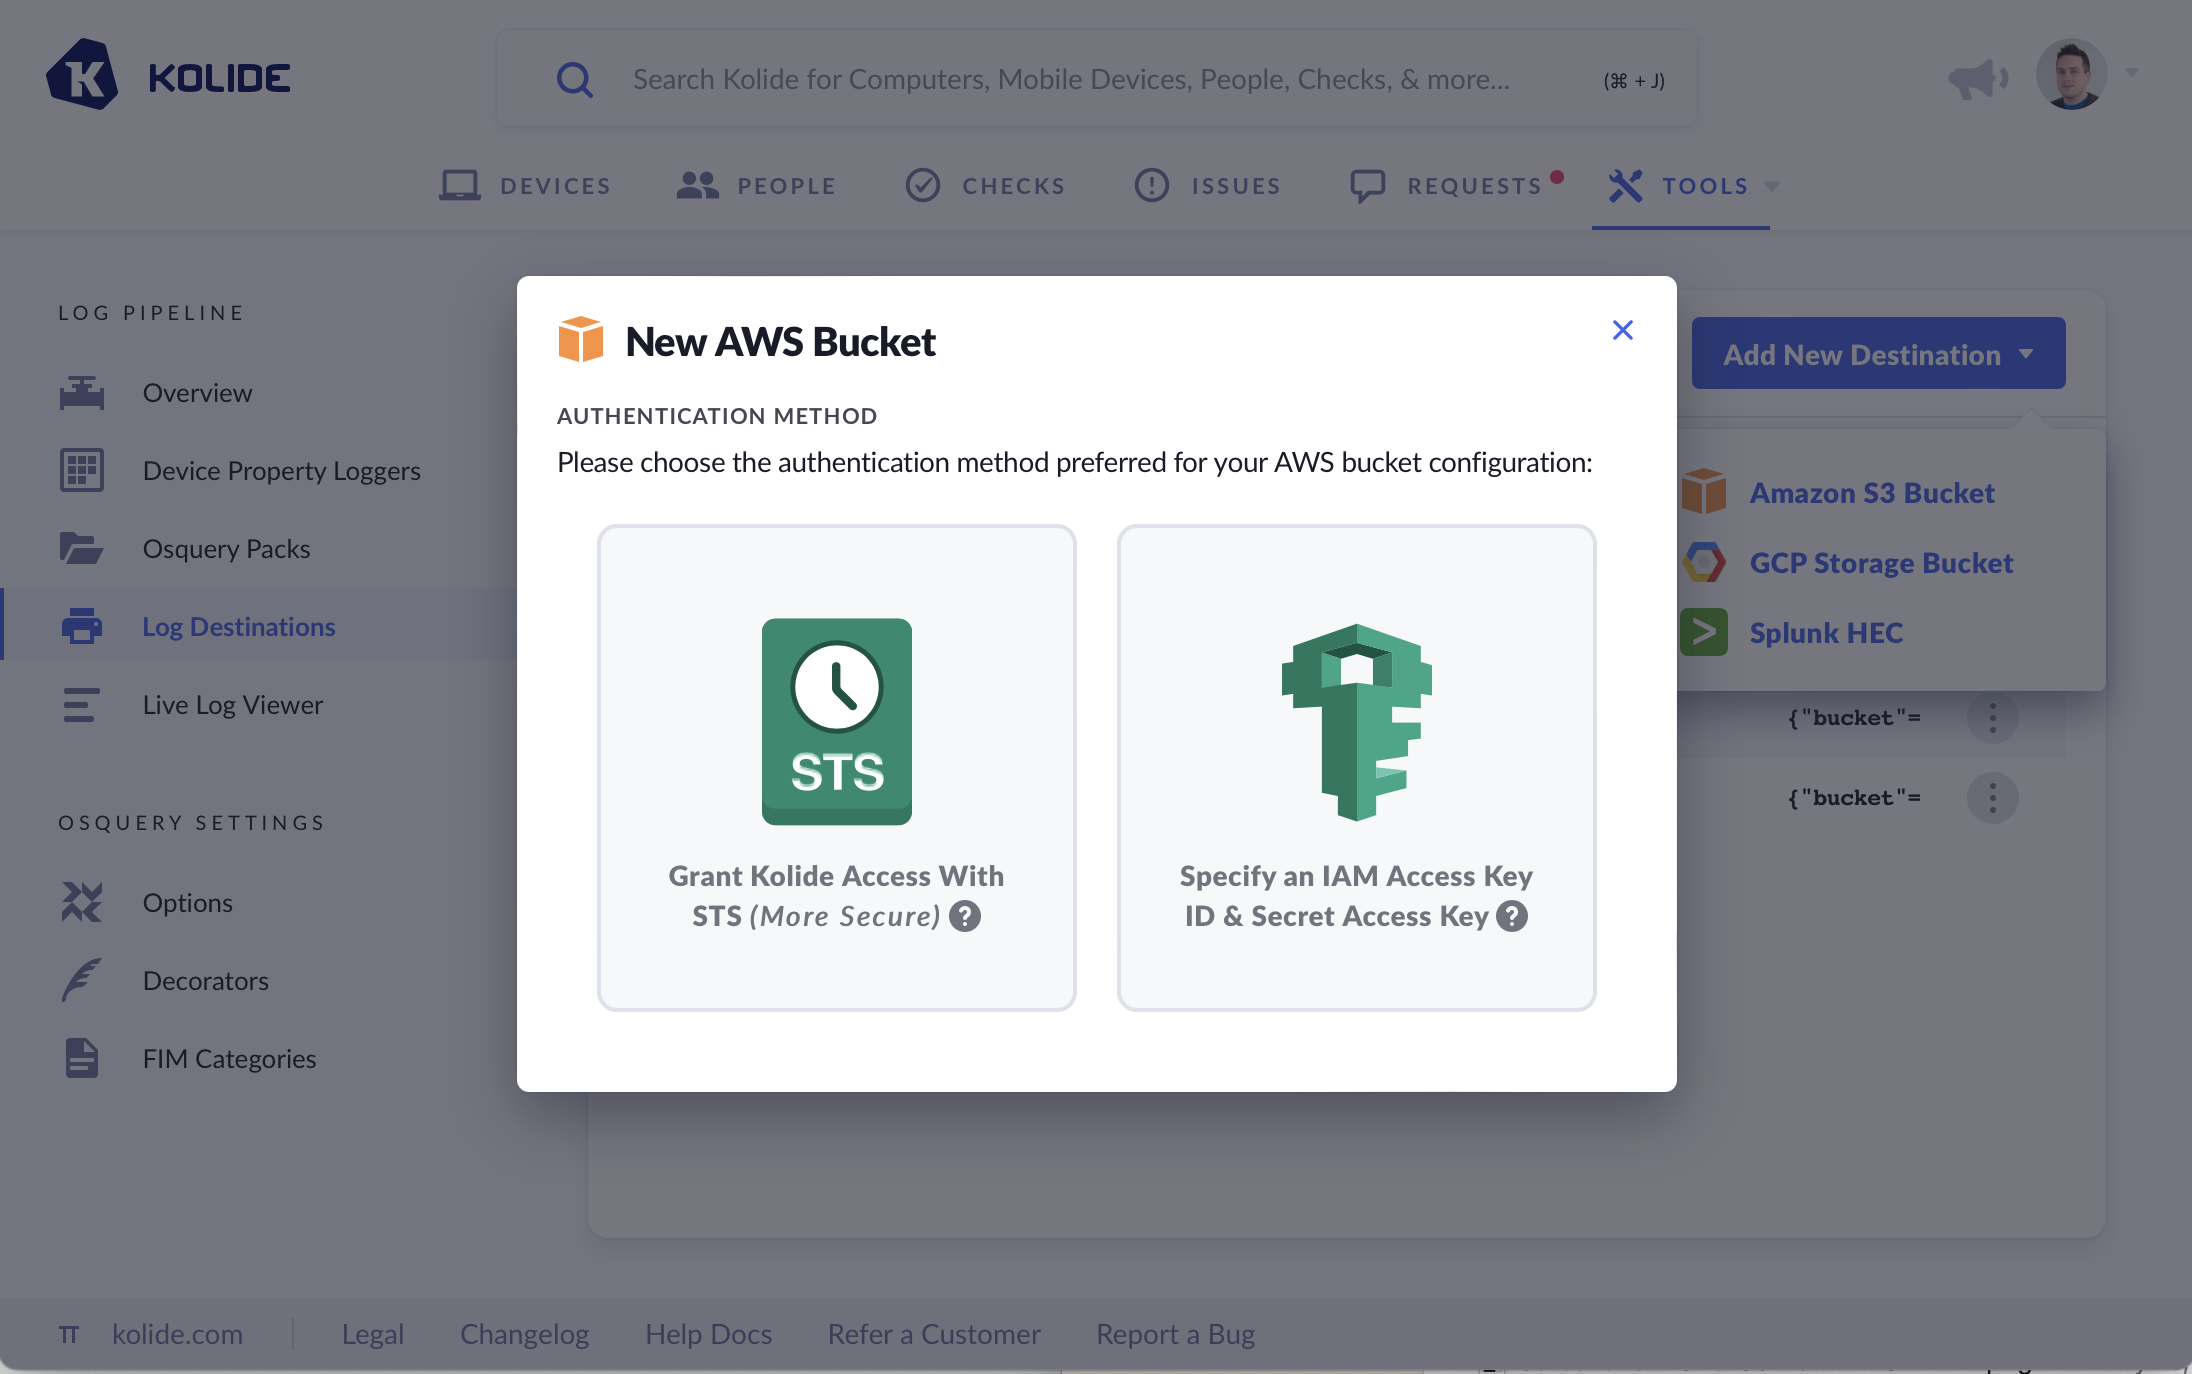
Most organizations should pick STS, it is the more secure option.
S3 Bucket Permissions
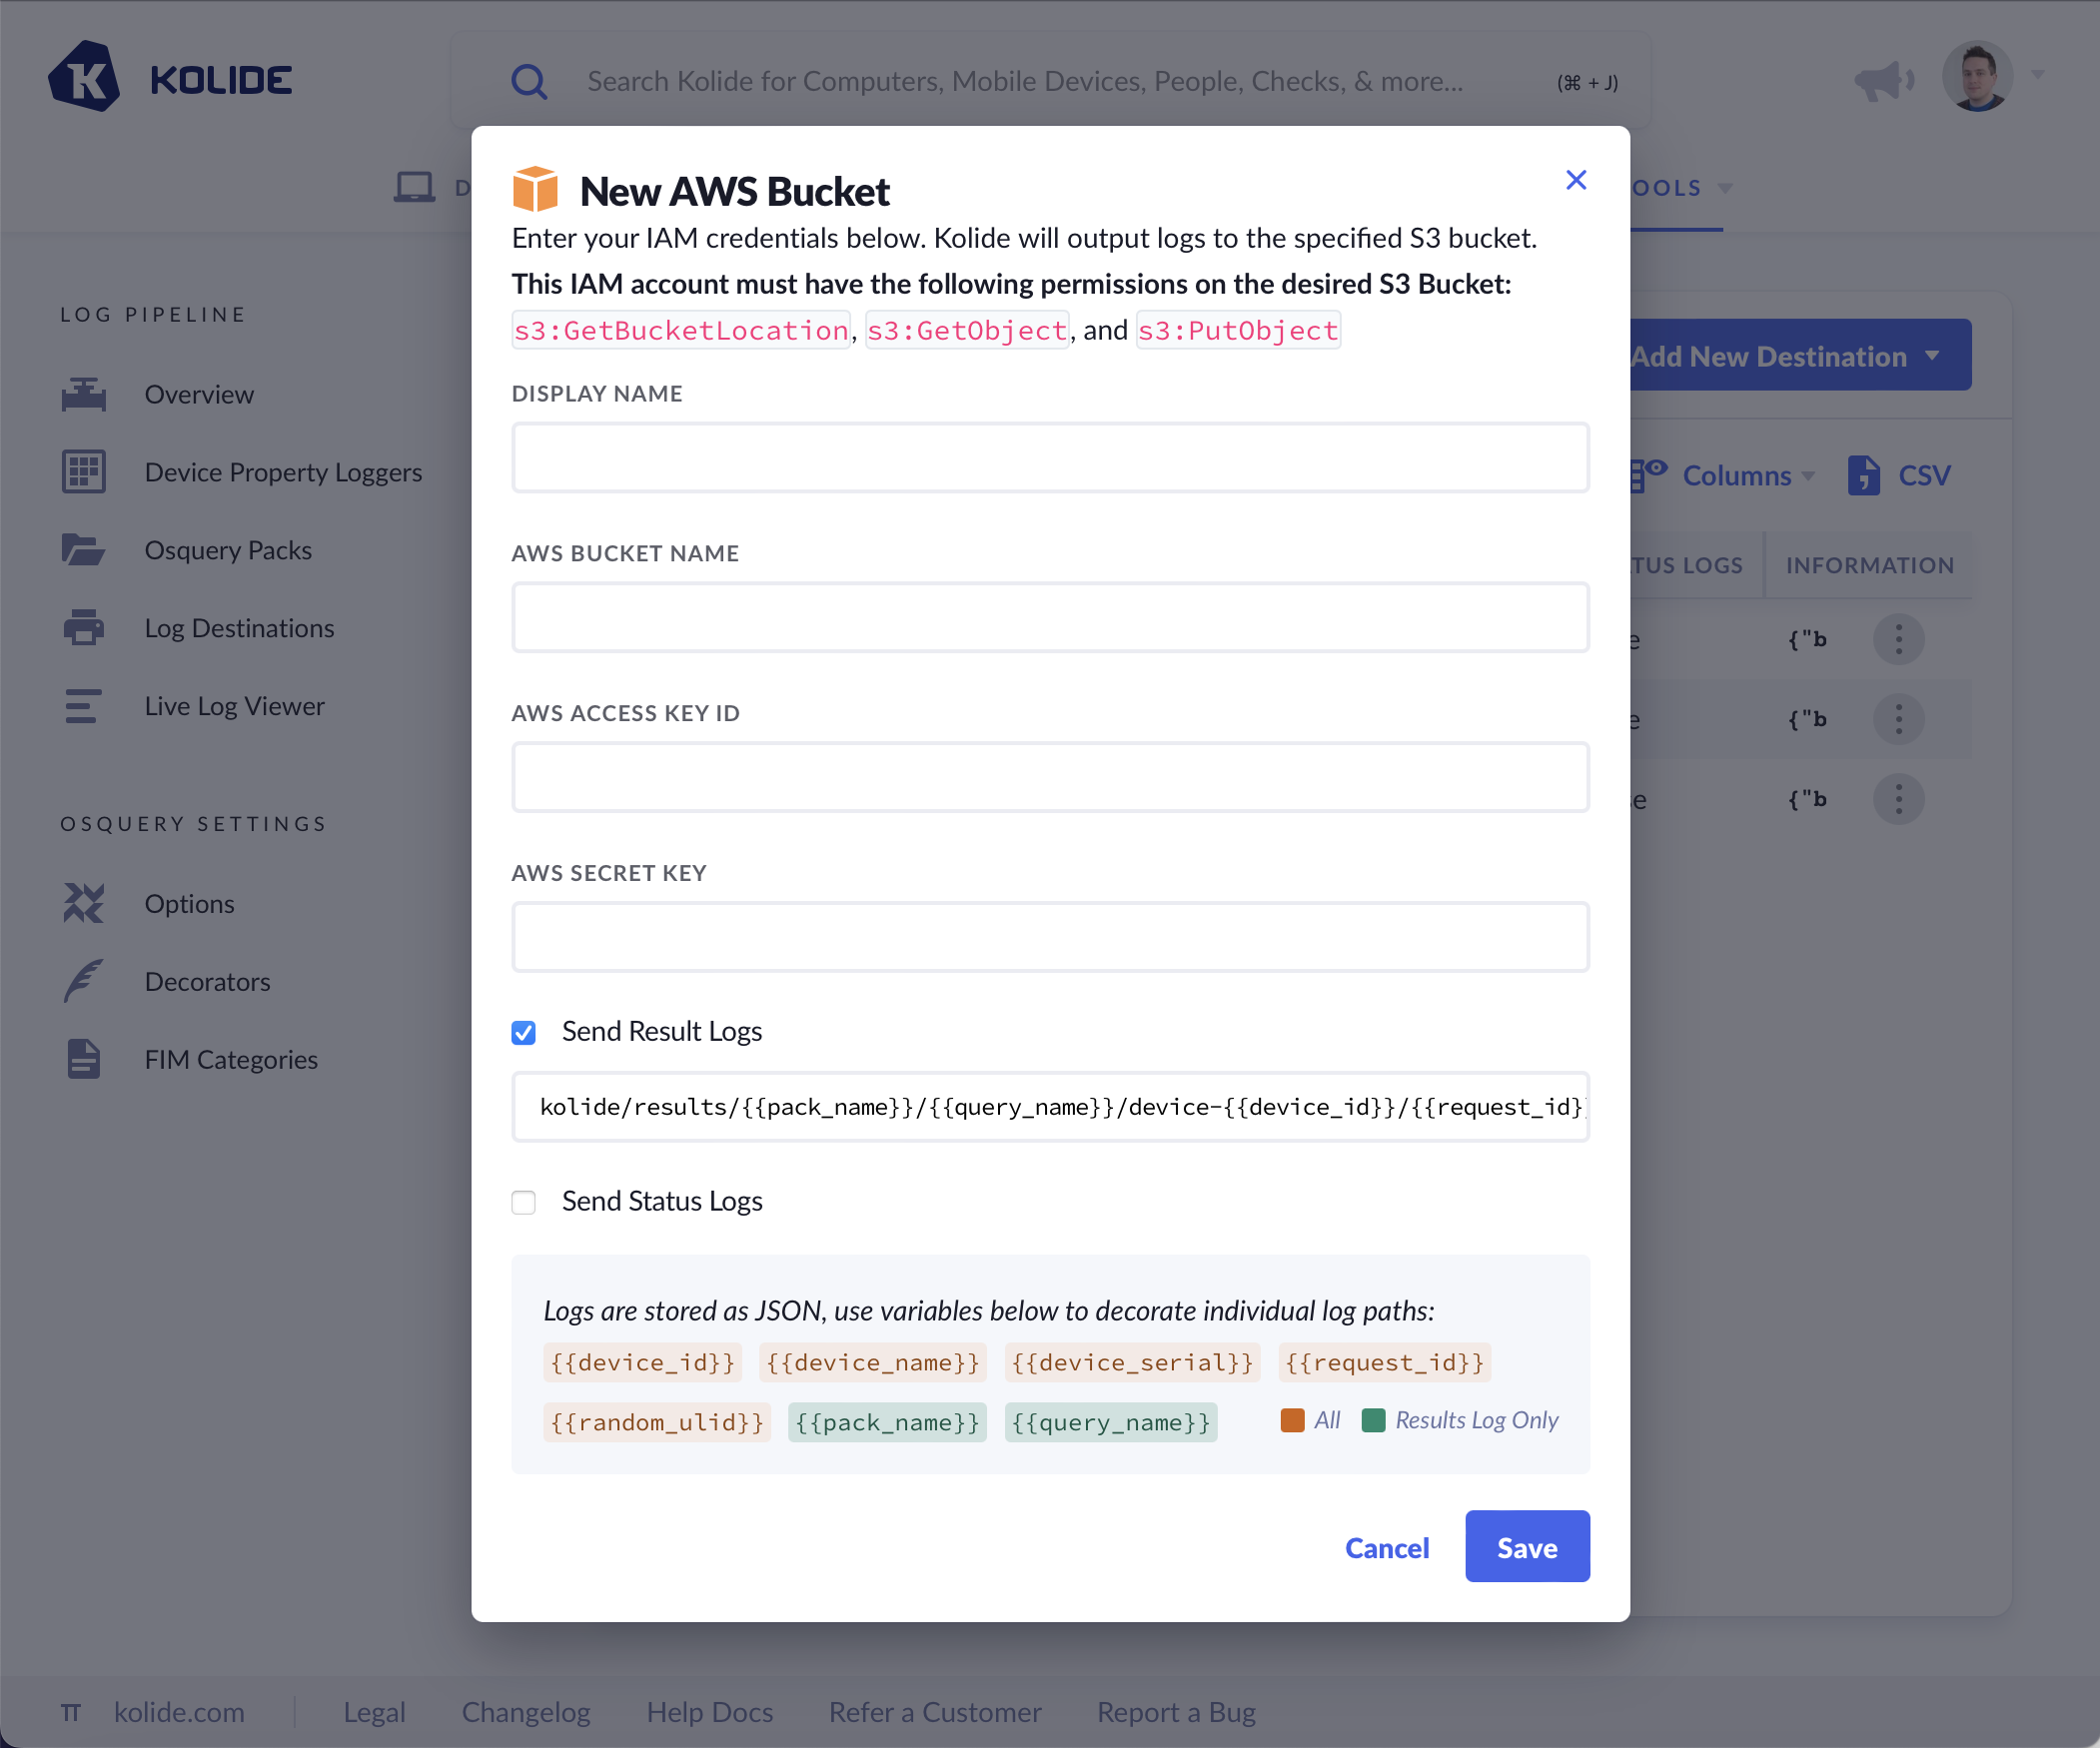
Regardless of which authentication method you choose, the IAM Role or IAM user account will need the following S3 permissions on the bucket specified in the form:
s3:GetBucketLocations3:GetObjects3:PutObject
These permissions allow Kolide to verify the existence of the bucket, check the state of the objects inside, and put new objects in the bucket as logs are emitted from the Log Pipeline.
Granting Kolide Access via STS
By using AWS’ Security Token Service (STS), your organization grants limited access to Kolide’s official AWS account so that it can publish logs to your desired S3 bucket. Kolide obtains this access by assuming an IAM role that is supplied via its ARN.
Creating an AWS IAM Role for Kolide
- Create a new role in the AWS IAM Console.
- Select AWS account for the trusted entity type, and Another AWS account.
- Enter
516897320088as the Account ID. This is Kolide’s AWS account ID, and it grants Kolide access to your S3 buckets specified later. - Select Require external ID and copy the external ID displayed in the form. Note: This ID is unique to your organization.
- Click Next.
- Find or Create a Policy that adheres to these S3 permissions for the S3 bucket that you want Kolide to write to.
- Click Next.
- Give the role a descriptive name, like
KolideS3LogDestinationRole, and add a description. - Click Create Role.
The trusted entity IAM role JSON policy file should look like the following:
{
    "Version": "2012-10-17",
    "Statement": [
        {
            "Effect": "Allow",
            "Action": "sts:AssumeRole",
            "Principal": {
                "AWS": "516897320088"
            },
            "Condition": {
                "StringEquals": {
                    "sts:ExternalId": "YOUR EXTERNAL ID"
                }
            }
        }
    ]
}
Once the role is created, you should be able to find it and click on it to view its details. Note the ARN, you will need it for the next section.
Complete Setup in Kolide
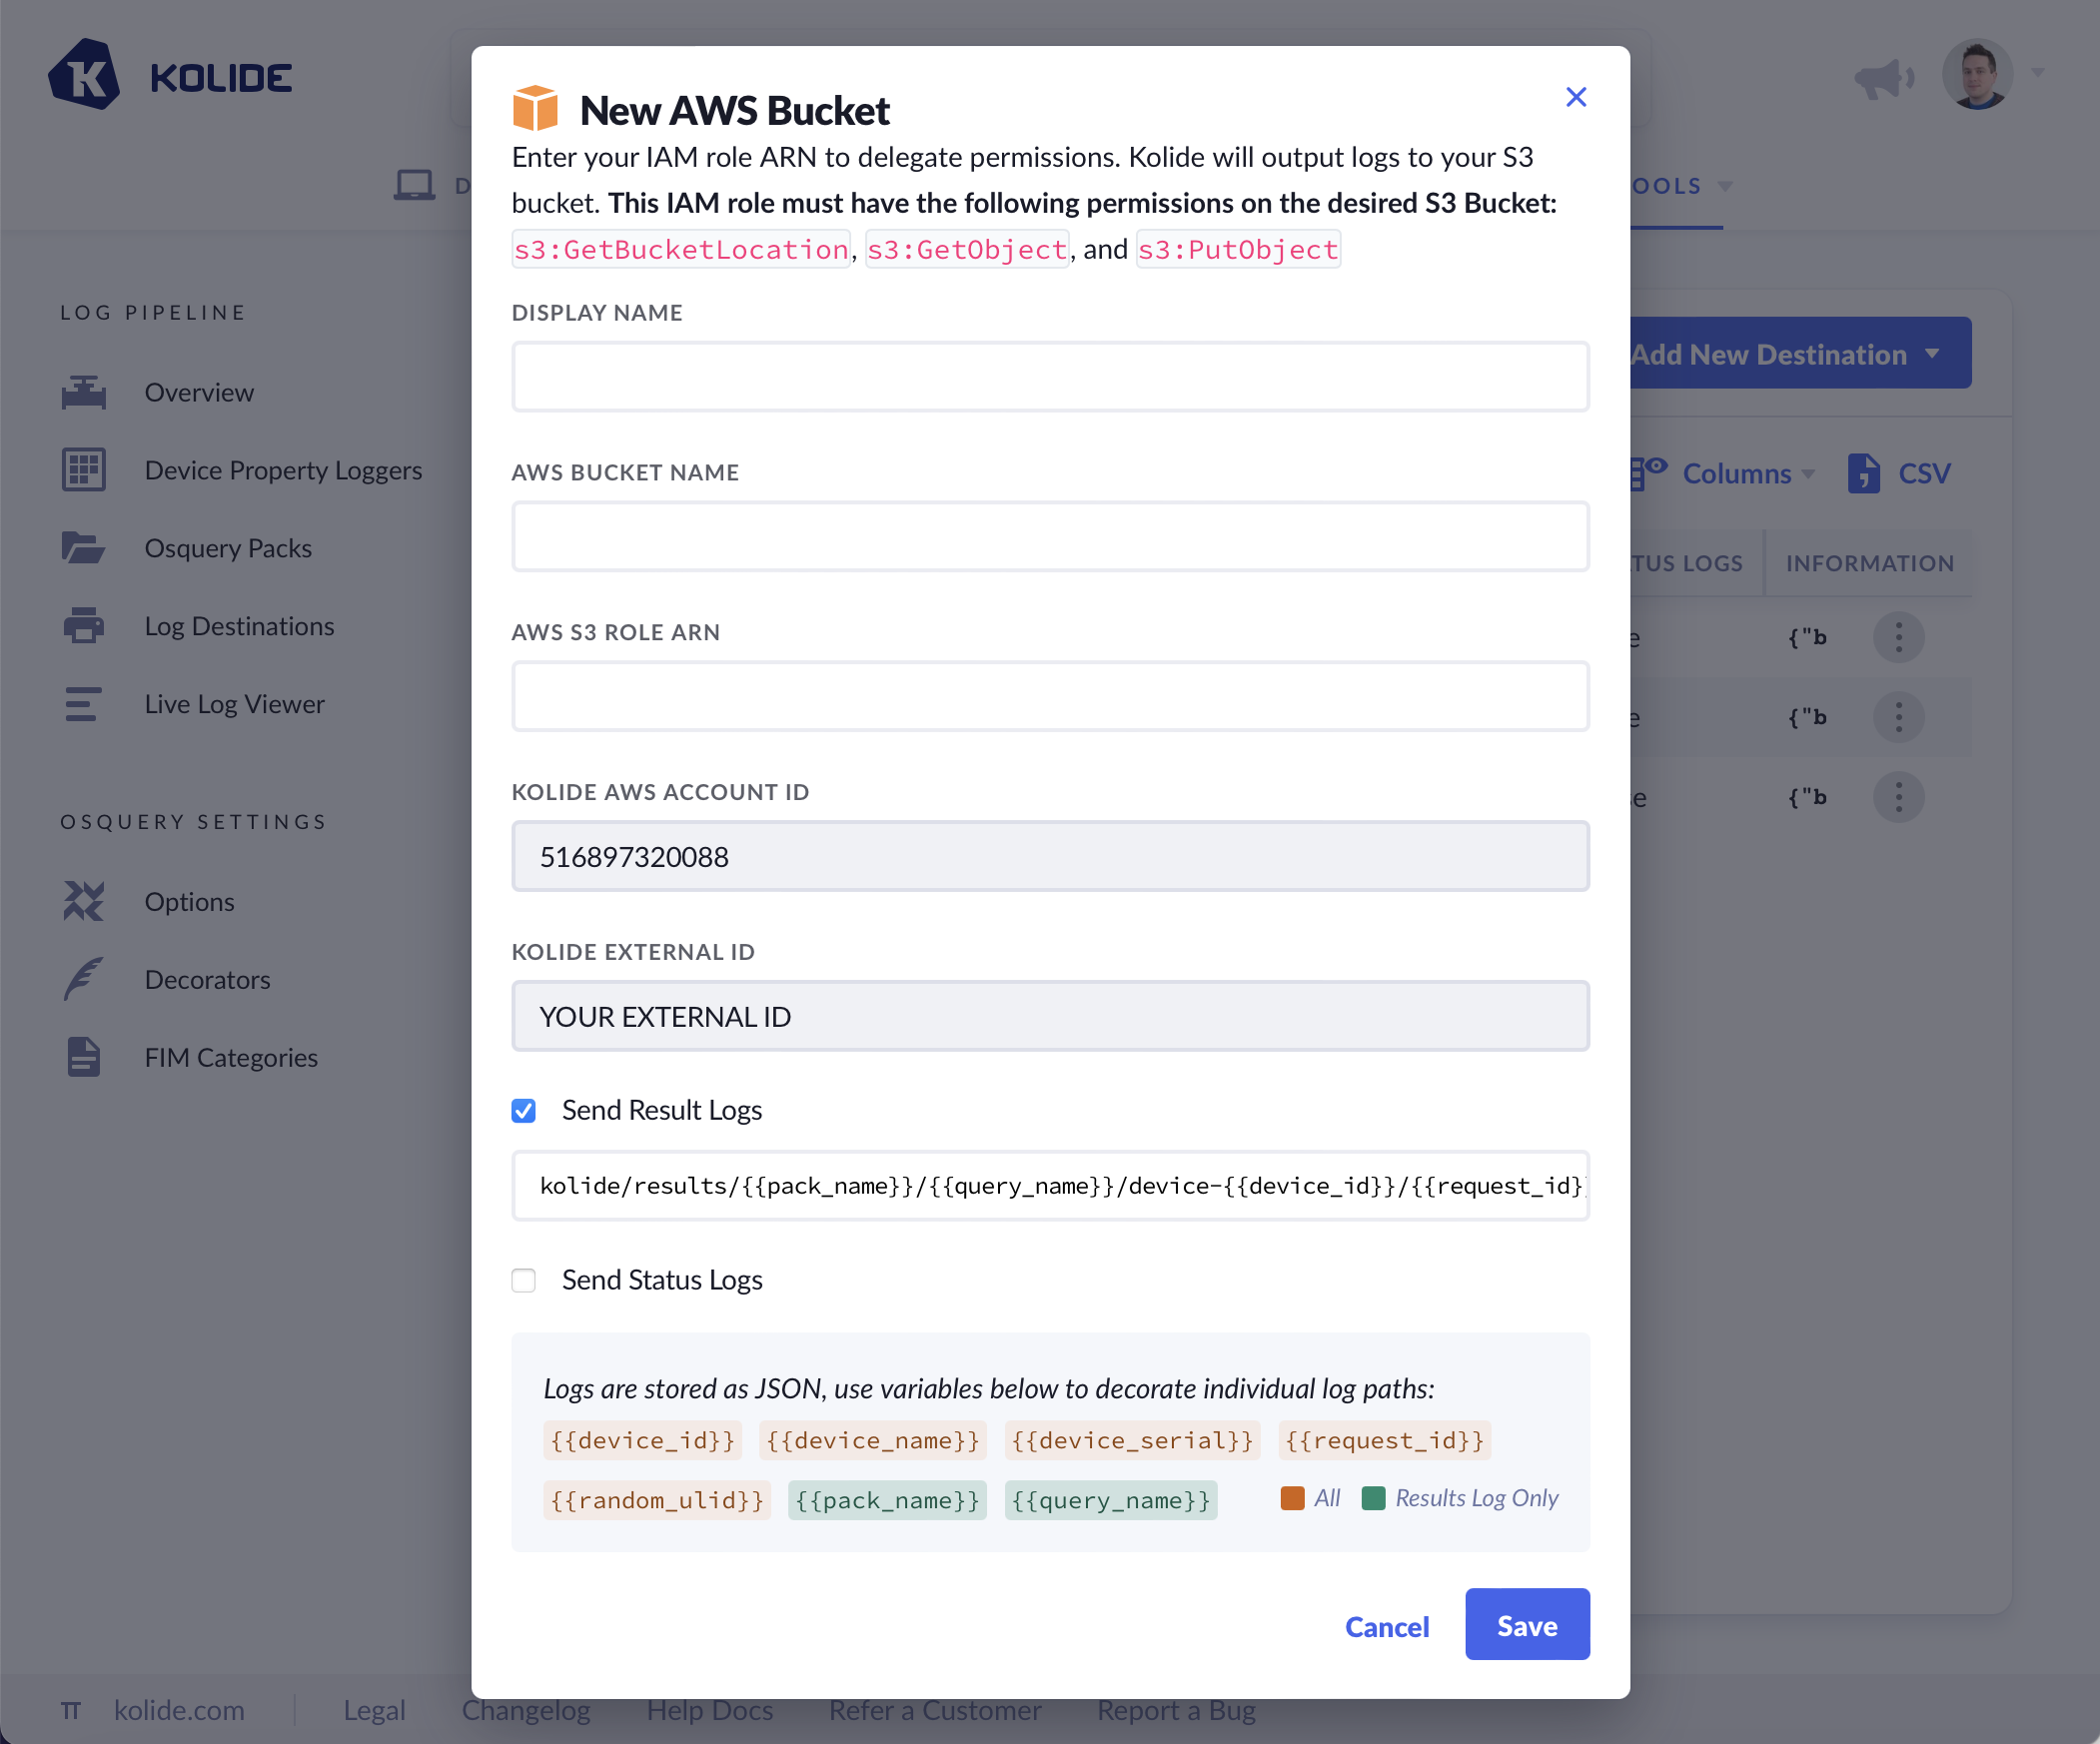
- Provide a Display Name for your bucket. This will help you differentiate it from your other configured log destinations.
- Provide the AWS S3 Bucket Name for your desired bucket.
- Provide the AWS S3 Role ARN, which comes from the role you created in the previous section.
- Choose the type of logs you’d like to emit and optionally modify how the S3 objects will be named.
Granting Kolide Access via IAM
- Before you begin, create IAM credentials for Kolide for the bucket with the appropriate S3 permissions.
- Provide a Display Name for your bucket. This will help you differentiate it from your other configured log destinations.
- Provide the AWS Access Key ID and the Secret Key (the secret key will be hidden from Kolide’s logs and symmetrically encrypted in Kolide’s database).
- Choose the type of logs you’d like to emit and optionally modify how the S3 objects will be named.
Log Naming and Formatting
As noted in the Add New Destination modal, logs are written to a custom path of your choosing. When constructing a path, you can choose from the following variables:
{{device_id}}- The unique identifier for the Device sending the logs.{{device_name}}- The display name of the device (usually its host name) or, if no device name is found, the stringNO DEVICE NAME.{{device_serial}}- The device’s hardware serial number or, if no serial is found, the stringNO DEVICE SERIAL.{{request_id}}- A ULID associated with the HTTPS request made by the Osquery agent. (Note: it is possible for files to share the same ULID across queries){{random_ulid}}- A random ULID that is generated for each log written into the bucket.{{pack_name}}- The name of the query pack (RESULT LOGS ONLY).{{query_name}}- The name of the query inside the query pack (RESULT LOGS ONLY). See the examples below on how to use these variables to construct these log paths.
Examples
Result Logs
kolide/results/{{pack_name}}/{{query_name}}/device-{{device_id}}/{{request_id}}.json
Status Logs
kolide/status/device-{{device_id}}/{{request_id}}.json